In the fast-paced world of coding, every keystroke counts. For developers immersed in Visual Studio Code (VS Code), mastering its features can significantly enhance productivity. One fundamental skill is swiftly selecting multiple lines, which can streamline coding tasks from refactoring to formatting.
In this article, we’ll explore the techniques and shortcuts within VS Code, empowering you to navigate your codebase with finesse and speed. Whether you’re a seasoned coder or a newcomer, this guide is your key to unlocking the full potential of VS Code’s multi-line selection capabilities.
How to Select Multiple Lines in VS Code
If you’re a typical VS Code user, you often need to select multiple lines to address a common issue: an element that doesn’t belong in each line. Selecting multiple lines makes it easy to fix all those lines at once.
Here’s how to select multiple lines in this program on your Windows PC:
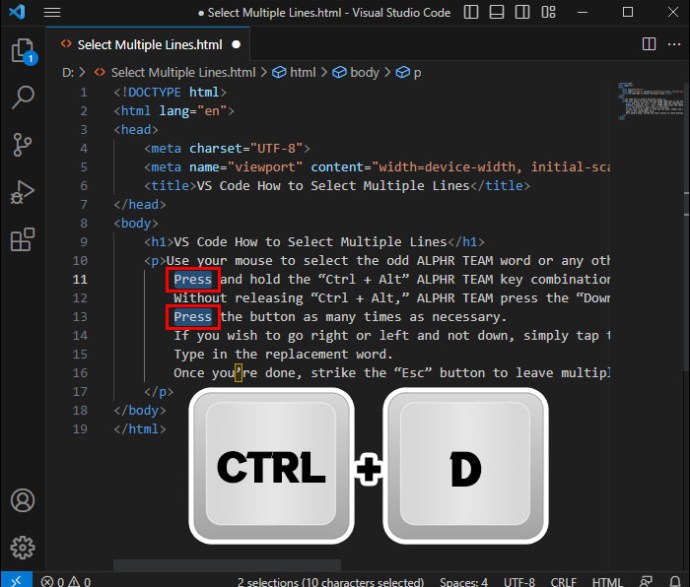
- Use your mouse to select the odd word or any other element.
- Press and hold the Ctrl + Alt key combination.
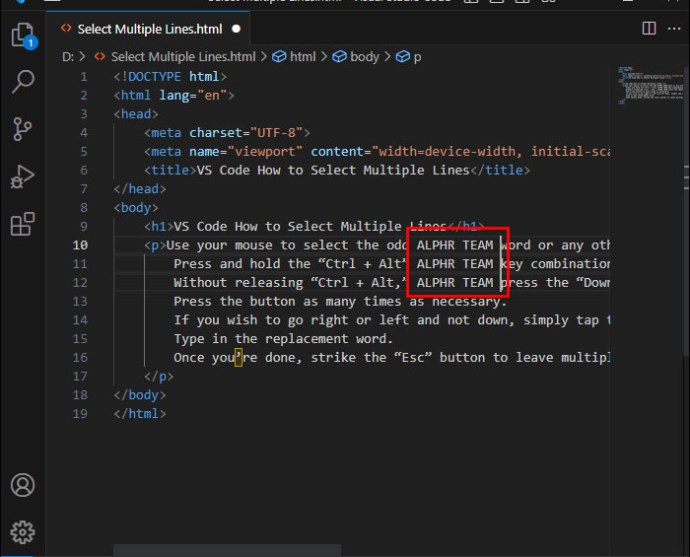
- Without releasing Ctrl + Alt, press the Down arrow key to select the same word in the lines below the original lines. Press the button as many times as necessary.
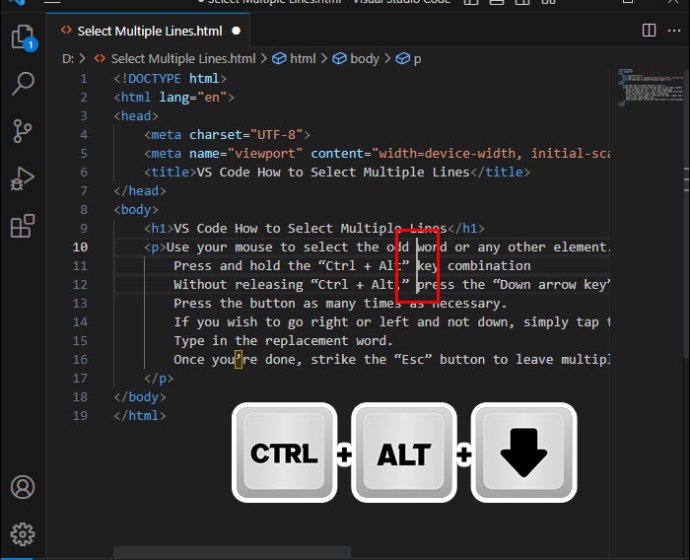
- Type in the replacement word.

- Once you’re done, strike the Esc button to leave multiple-line editing mode.
The process is just as simple for macOS users:
- Select the place in the line you wish to edit and hold the Option + CMD key combination.

- While holding the shortcut, use your Down arrow key to select that place in each line.

You shouldn’t have trouble selecting multiple lines if you’re a Linux VS coder.
- Highlight the part of the code you want to remove or replace, and press and hold Shift + Alt.

- Without releasing the Shift + Alt combination, use the Down arrow key to highlight the same element in the other lines.

Next, you should learn how to compare two files in VS Code.
How to Insert Multiple Cursors in VS Code
Selecting multiple lines isn’t the only way to edit several lines simultaneously. You can also utilize the multi-cursor functionality. Once you add a multi-cursor, you can tweak several lines simultaneously by typing the same value for each line.
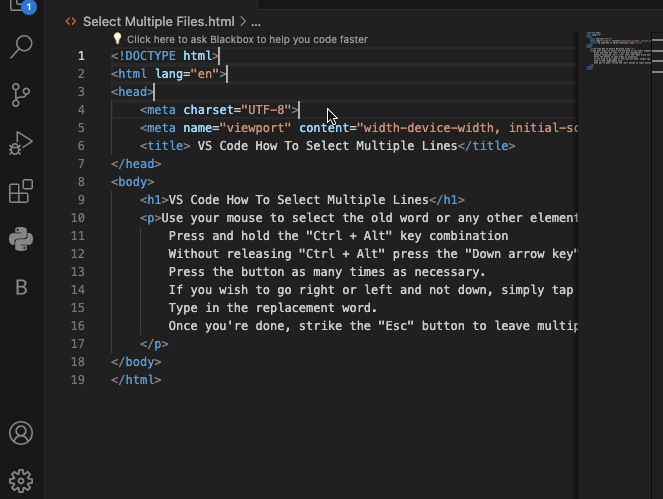
For example, you can take the following steps to incorporate individual cursors into your code.
- Click the first line and hold the Alt button if you have a Windows or Linux PC to place a multi-cursor in the lines where you click. Alternatively, press the Option key if you’re a macOS user.

- Once you no longer need your multi-cursor, tap the Esc button to remove it from your workspace. Esc is the universal key for all operating systems.

Here are a few other convenient multi-cursor-related features to help skyrocket your productivity when selecting and editing several lines.
Place Cursors at the End of Lines
Some projects require you to place your cursors at the end of each line.
- Highlight multiple lines with the shortcut from the first section, depending on your operating system. For instance, Windows users must press and hold the Ctrl, Alt, and Down arrow keys.

- Tap the Shift + Option + I combination on your macOS device.
- Shift + Alt + I if you’re a Linux or Windows user.
Place Cursors Below and Above the Current Cursor
Line endings might not be the best position for your cursors. Sometimes, you need to be more specific and place them below and above your original cursor.
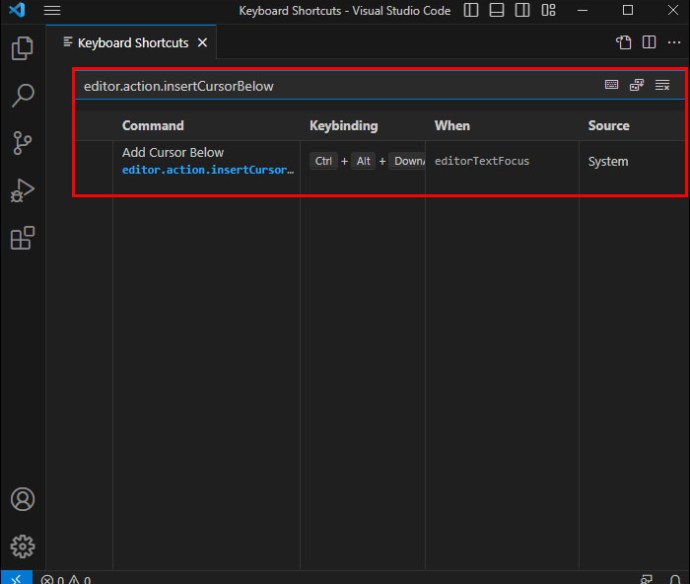
- Select your starting point by placing your cursor on one of the lines. Strike the Ctrl + Alt + Down arrow key to place a multi-cursor below the original cursor if you’re a Windows or Linux VS coder.

- If you have a macOS computer, utilize the CMD + Option + Down arrow key to perform the same action.
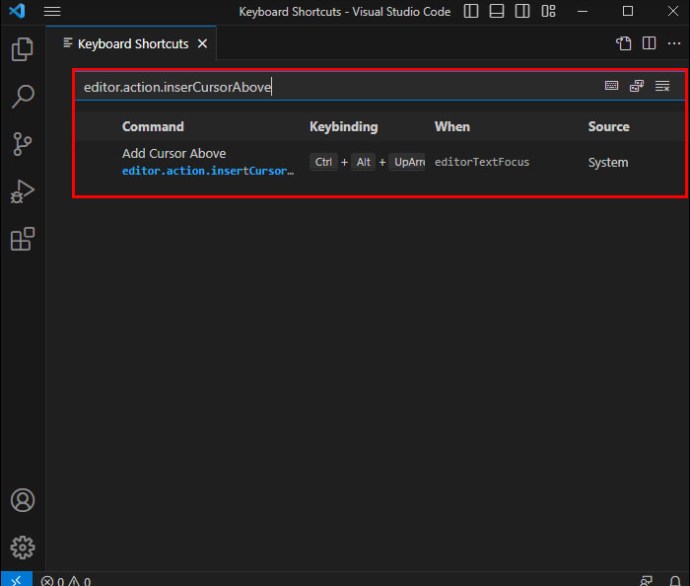
- If necessary, utilize the Ctrl + Alt + Up arrow key to incorporate a multi-cursor above the original one on Windows or Linux. For macOS platforms, you must press the CMD + Option + Up arrow keys to place the cursor above the starting point.

Place Cursors at the Next Corresponding Location
Do this if you only want a cursor at the matching part of the line closest to your starting point.
- Highlight the line using your mouse.
- Tap the Ctrl + D key combination if you’re a Windows or Linux user. (CMD + D if you’re a macOS coder.) This will insert multi-cursors next to the matching parts of the code that come after the original selection.

- Remove some cursors with the Ctrl + U shortcut on Windows and Linux if necessary.
- CMD + U on macOS. Keep in mind that this shortcut deletes the cursors one by one. A combination doesn’t allow you to undo all the elements in one go.
Place Cursors at Every Corresponding Location
When placing your cursors, you may not want to incorporate them at neighboring lines only. Instead, you might need to add them at all matching places. Here’s how this works.
- Highlight the part of the code where you wish to add cursors.

- Strike the Ctrl + Shift + L key combination if you have a Linux or Windows PC to place a cursor wherever the highlighted text appears.
- Use the CMD + Shift + L shortcut if you’re a macOS professional.

This method also works to change all instances of a variable name.
How to Customize Cursor in VS Code
Your cursors are pivotal when selecting and editing multiple lines in VS Code. However, their default behavior may not suit your project perfectly. You may need to tweak their operation and use different key bindings to enhance productivity.
The first thing you may want to do is to set up an alternative multi-cursor modifier.
- Open your workspace and use the Ctrl + , key combination if you have a Windows or Linux operating system.
- You’ll need to strike the CMD + , shortcut if you’re using VS Code on macOS.
- Type in the following line in the box: multiCursorModifieer
- Change the default modifier button from Alt to whatever works better.


That’s not the only key binding you can tweak in VS Code. The settings menu allows you to change any cursor-related shortcut for easier data manipulation.
You can do this from your editor.
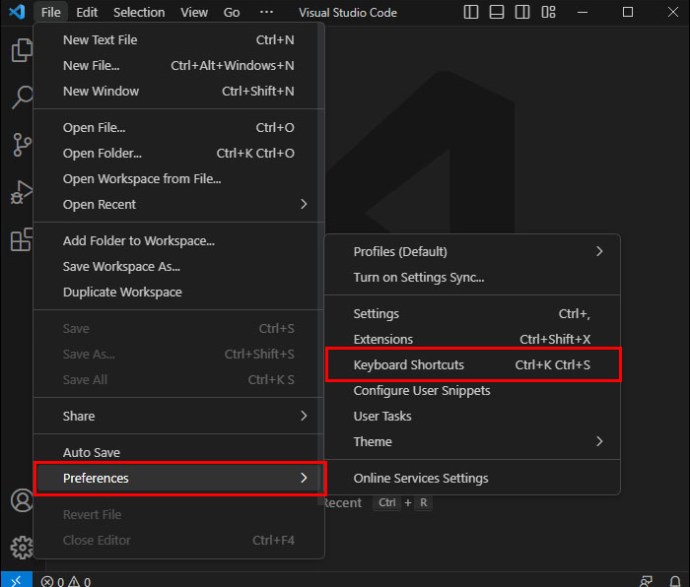
- Start VS Code and select File from the main menu.
- Head to Preferences under File and bring up the Keyboard Shortcuts window with the CMD + K + CMD + S key combination or macOS or Ctrl + K + Ctrl + S shortcut on Windows and Linux. You must release the first letter (e.g., K) before pressing the other combination (e.g., S).
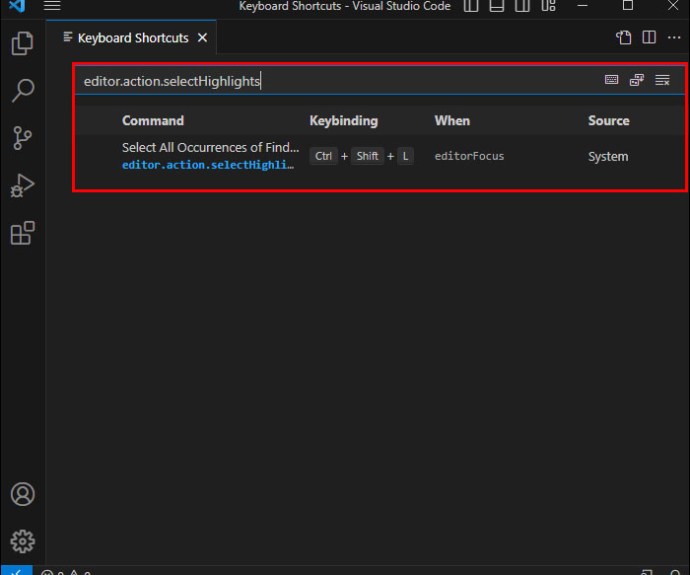
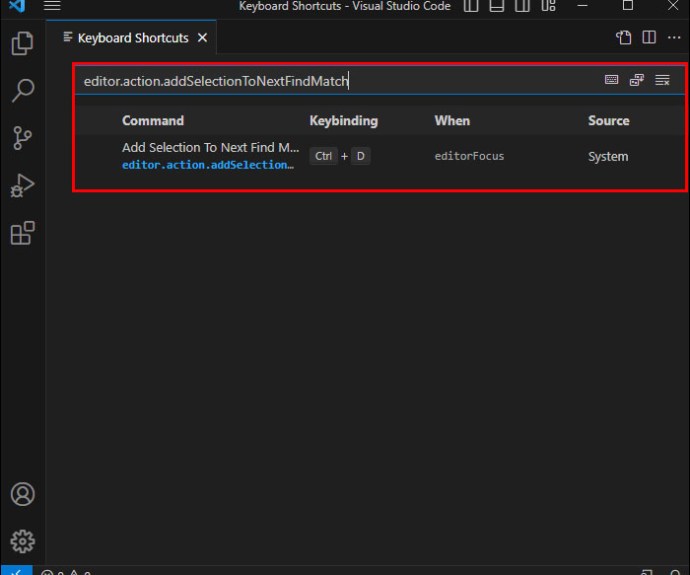
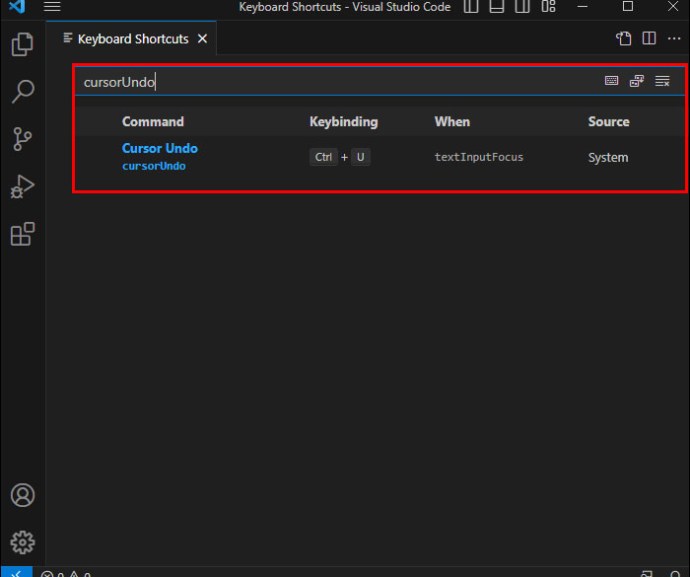
- Type in the ID of the shortcut you want to change. Here are some:
• editor.action.insertCursorBelow
• editor.action.inserCursorAbove
• editor.action.selectHighlights
• editor.action.addSelectionToNextFindMatch
• cursorUndo
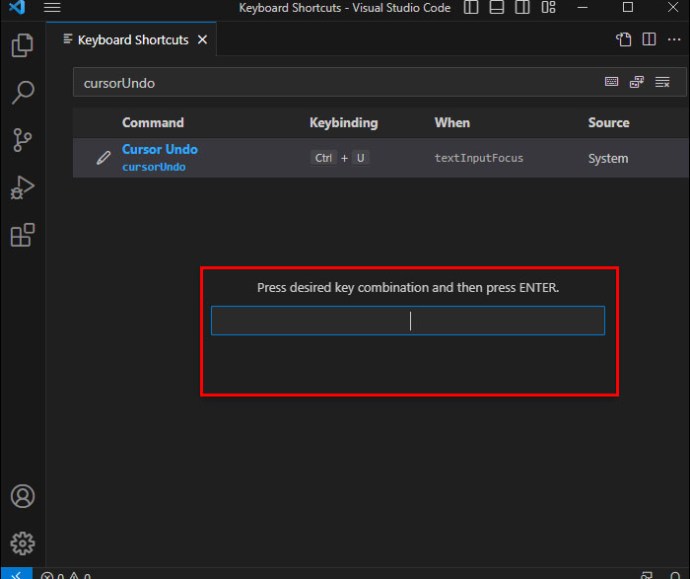
- Change the corresponding shortcut with the edit symbol in the left part of the window.

Let VS Code Features Do the Work for You
Learn some useful VS Code keyboard shortcuts and automate as many processes as possible to become a master of the source code editor. Selecting multiple lines and tweaking your cursors are great starting points. Experiment with different positions and functionalities to achieve the perfect solution for each project.
FAQs
Can I select lines based on their line numbers in VS Code?
Yes. Using the Ctrl + G keyboard shortcut will let you choose a line number to jump to.
Does VS Code support selecting lines across multiple files simultaneously?
Yes, VS Code uses the “Find in Files” feature to select lines across multiple files simultaneously. Press Ctrl + Shift + F (Cmd + Shift + F on Mac) to open the “Find in Files” widget, enter your search criteria, and then use the checkboxes or keyboard shortcuts to select lines across the search results.
Related Posts
 How to Plot Multiple Lines in Excel
 How to Select Multiple Emails in Gmail
 How To Select Multiple Layers in Procreate
 How to Open Multiple Folders in VS Code
 How to Remove the Dotted Lines in Excel
 How to Run Code in VS Code
 How to Format Code in VS Code
 How To Auto-Format Code in VS Code
 How to Run Code in Terminal in VS Code
Disclaimer: Some pages on this site may include an affiliate link. This does not effect our editorial in any way.


